

Table of Contents
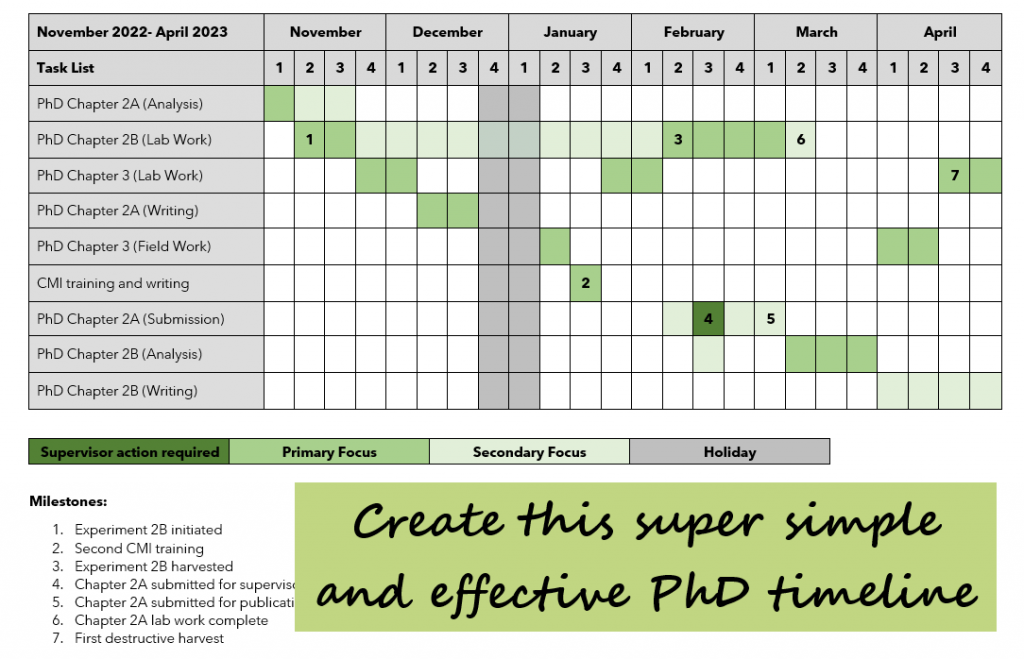
In this post I've provided a step-by-step how to guide to create a 6 month timeline template for your PhD and postgraduate studies. I've also included some pointers along the way. These are approaches I use to make the timeline more useful for me and my supervisors. Feel free to customise colours and things as you go.
This project is super quick and simple but looks professional so is suitable to include in a research proposal or report. Whilst creating a timeline can be fun and is essential we don't want to waste too much time doing fancy Gantt charts (unless you love them).
If you want to skip creating your own PhD timeline in Word from scratch, then the one that I have created here is available for download. Scroll down to the bottom of the post to find it. It's available as a modifiable Word document or as a printable PDF if you fancy doing it manually.
My top tips for an accurate PhD timeline
- Don't have more than one 'Main' and one 'Secondary' task at any one time.
- Don't try to plan at any higher resolution than a week for a 6 month timescale.
- Include milestones and important dates so that you have clear progress markers.
- Include times when you'll need your supervisor's help.
- Use the size of the page to limit the number of tasks you can fit in. If they don't fit on a page it's too granular.
Lets go!
Step-by-Step to make a Gantt-style timeline in Word
Time needed: 1 hour.
1 - Open Word and turn the page to landscape.
This guide will create a 6 month timeline, with one month split into 4 weeks. If you want more or less, just change the number and/or arrangement of columns. If you have lots of tasks, but cover a shorter time period, then portrait orientation may be better.
Layout -> Orientation -> Landscape
Layout -> Margins -> Narrow
Narrow margins make optimal use of space.
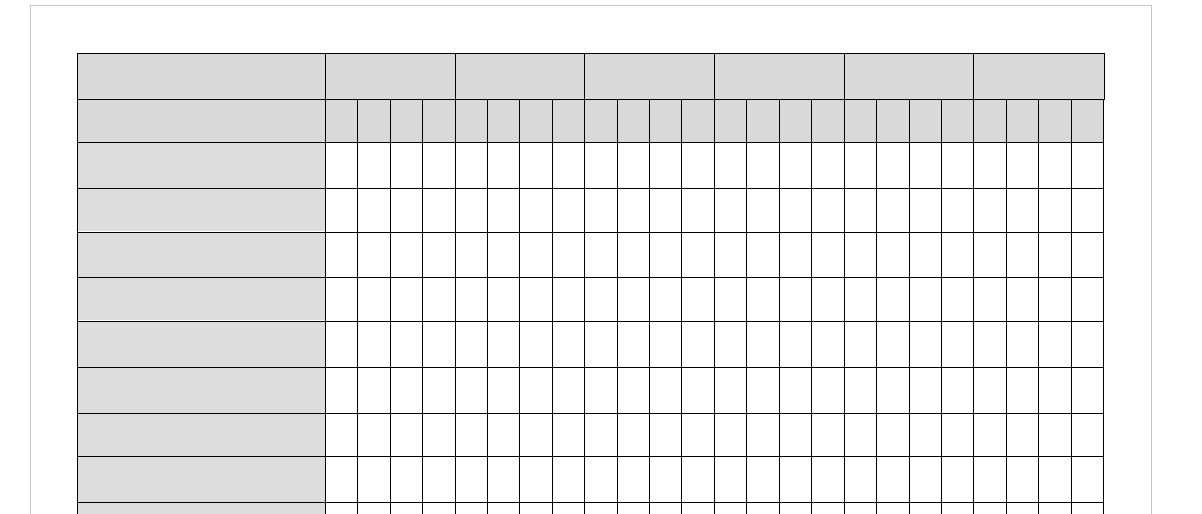
2 - Make a table.
Insert -> Table -> Insert Table. Enter 25 for columns and 15 for rows.
3 - Change column widths
Select all columns apart from the first one by using the black down pointing arrow that appears when you hover over the top of the table. Start from above the second column, hold down the mouse and drag over to the top of the last right hand column.
Right click in the grey highlighted area.
Table Properties -> Column -> Preferred width = 0.85cm
Now highlight just the first column using the technique described above.
Table Properties -> Column -> Preferred width = 6.5cm
4 - Merge cells
For the row along the top, we are going to merge every 4 small cells into one big one. This is to create the headings for the months.
Drag the mouse across the first four small cells.
Layout (on the top ribbon) -> Merge Cells (half way along)
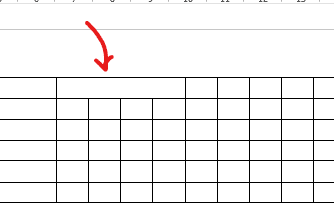
Do this for the next 5 lots of 4 cells. You will end up with 6 cells across the top line. These will be your months!
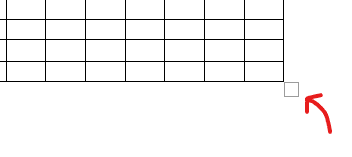
5 - Expand the table to fill the page.
Use the table handle in the bottom right corner of the table to drag the table to expand it down the page. Leave a bit of space at the bottom of the page as this is where we are going to put our colour key and any notes.
6 - Now lets add some colour
Highlight the entire top two rows by clicking the mouse to the left of the top row and dragging down to the second.
Table Design -> Shading -> Select a colour you fancy. I've gone with light grey.
Do the same for the first column.
7 - Start adding text headings
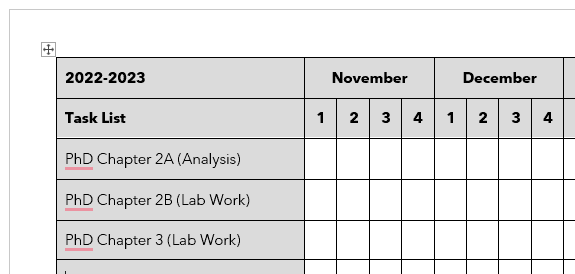
Add the year in the top left cell, 'Task List' in the one below that.
Add the your next 6 months in the columns along the top.
Add the weeks in the column below these. I use 1,2,3 and 4 for each month, but you could use consecutive numbers like the teaching week number.
I also like to have these headings in bold.
8 - Align the text in the columns
Select all rows and columns apart from the first column.
Layout -> Alignment section -> Align centre (the box in the centre which shows the different text alignment options).

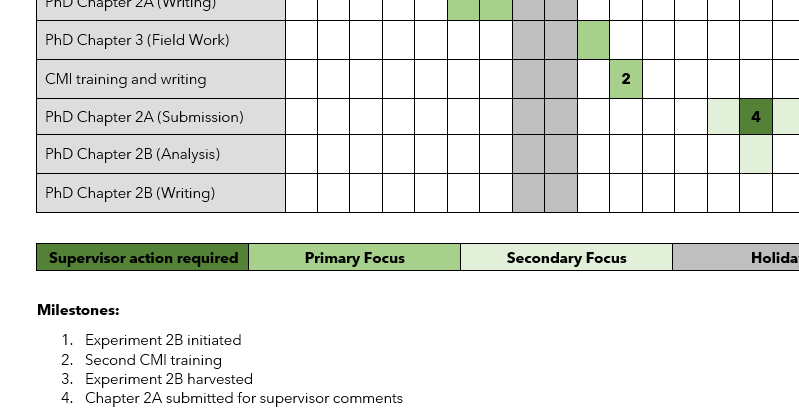
9 - Make a colour key below your timeline to show your task priorities.
Click below your table and hit 'Enter'
Insert -> Table -> Make a 4x1 table by selecting the four boxes of the first row
Select the first box -> Table Design -> Shading. Select your chosen colour.
The aim here is to have the darkest shade on the left, and then the colours get lighter as you go further right. Make the last box a different colour.
In the first box write 'Supervisor Action Required', then in the second 'Main (or Primary) Focus', the third 'Secondary Focus' and the fourth 'Holiday'. Bold all the text. Centre the text.

Centre the text like we did above.
10 - Change the font to something you like or that matches your report
Press Ctrl + A to select everything.
Home -> Font section -> pick something from the list.
I've gone with Avenir Next LT Pro.
11 - Add your tasks in the order you expect to do them
The next bit is up to you. Add tasks into the list on the left. Keep them pretty high level. Remember that you're working to the resolution of a week. Put in any training, conferences, reports due etc. Add them in the order that you will be doing them.
Don't go beyond one page. Around 14-18 tasks is more than enough.
If you need to add a row, use the little 'plus' icon that appears between the rows when you hover over the left of the table.
To delete a row, click on the row you would like to delete. Right click -> delete cells -> Delete entire row.
You may find yourself re-jigging them around a bit as you move onto the next task.
12 - Fill in the colours related to how you will be prioritising your time during that week!
This is the bit where you get down to details. You will have noticed on the key there are several 'statuses' that your time can be in:
- Supervisor Action Required: So that your supervisor knows when you plan on submitting work to them or will need their help.
- Main Focus: The main task you will be working on at that time
- Secondary Focus: Something that you will be working on in the background, that's important but doesn't form the main bulk of your work. It might be something that needs time to mature e.g. while a paper is in review.
- Holiday: Get these in first! Everyone needs a holiday and you'll want to factor these into your plan.
The key is not to have more than one 'Primary' task and one 'Secondary' task.
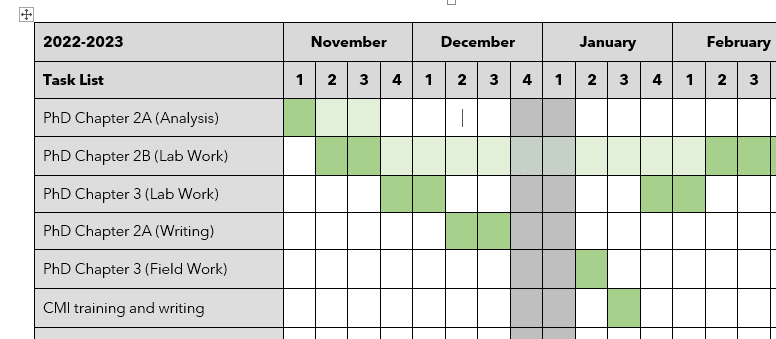
I split my tasks into experiment numbers (when I didn't know what my chapters were going to be) and chapters. Chapters can be any one of; reading, writing, lab work, field work, analysis and submission. This delineation keeps things super simple and avoids having to break things down into more specifics. Do what works for you.
13 - Add in your milestones
Add in important dates and achievements in using numbers with descriptors following your colour key.
And that's it! Pin it on your wall to help see where you're at and what you should be focussing on. Supervisors love to see a timeline plan too. You may want to produce a more detailed 12 week plan as things can get a bit hazy after this period of time.
If planning is something you're trying to improve, check out my post on how I do a Weekly Review to help keep on track.
Hope you've found this tutorial useful. The aim is to make it as simple and helpful as possible so that you can spend as much time as possible doing your PhD, rather than planning it. If you don't want to create your own, use the templates I've made available for download below.
👉 Downloadable PhD timeline templates
Here's a blank version in Microsoft Word with some examples to get you going:
And here's a blank PDF for you to print out and use coloured pens and pencils to beautify and make it your own:
Don't forget to subscribe to my newsletter to get biweekly insights straight into your inbox.


Comments